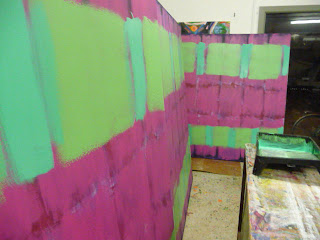
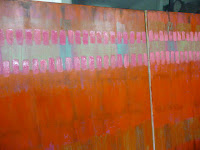
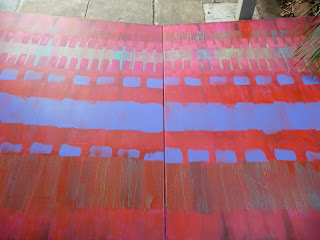
In February 2012 I was invited to submit a proposal for an art commission to go into The Cube Wodonga. I saw the impressive space in late February and submitted the proposal on March 21. My proposal for a large painting was based on works from a previous exhibition 'twenty' in 2008.
Stage 1 The EOI - The Artist's Brief
The City of Wodonga's brief was outlined as follows - Introduction; Scope of commission; dimensions of the space; specific stipulations such as the minimal life span of any art work, cleaning and maintenance, copyright and contractual terms and crucial dates.
There were holdups and the commission was underway in my studio on Friday June15
Stage 2
Stretcher bars unpacked, sorted by size, paired up for drilling. This commission is so big it has to be painted in four pieces - each canvas is 1.8x1.6m. Total dimensions for the very large wall in the foyer is 3.6 x 3.2m.
Basic logic says pair up the central bars which will be bolted together very securely on site before framing on site and then installing!
Before this first stage I have a vision of what I want in the space - and I'm sure so has the City of Wodonga! There is much trust in my ability to follow through with the commission. The time frame is tight, three weeks until I deliver the work. However I like to work to a schedule and I am in a position to be able to work day and night on the project for the next 2 weeks.
Very excited that I can use the sawhorse and the electric drill! Drilled through two thicknesses. Bolts seem to go through but too big - practical partner suggests smaller thickness of bolts with washers and butterfly nuts. The world of nuts and bolts is opened - walls and walls of bolts and nuts and bits and bobs at Bunnings and other tool shops. This is a very different world.
Colour and shape reassure me that I can't and won't get these bars mixed up.
Next step is to put the four large stretchers together with the cross braces. Necessary to MAKE SURE the appropriate bars are in the right places. This is a logical exercise that has me getting hot under the collar. The area outside my studio is just long enough to fit the length of one half of the assembled
So far so good, now for the stretchers to be stretched with canvas
This is how I was taught and it's still good - cut canvas straight and put on horizontal surface; lay down the stretcher face down. make sure the warp and weft of the canvas is at right angles. Have about 12 cms (if a large canvas) extra on the four sides. If all lined up, on one side staple from the centre to 30 cms from each corner. The move to the opposite side and do the same. then do the same of the other two sides making sure everything is even and taut.
Corners are 'hospital' folds. the idea is to have a minimum of 'tucking' and folds. This procedure will be returned to.
At this stage 4 canvas stretchers had to be primed with gesso at least 3 or 4 times. My approach is to do several thinner coats rather than two thick coats. The thickness of the gesso can increase but each layer needs to be dry in between. You 'prime' the canvas to make it impervious to the paint. Traditionally surfaces were sealed with rabbit skin glue then primed with whitening. I use a quality acrylic gesso which seals and primes. For this painting the gesso was fine - the canvas shrinks into a taut surface strong enough to take many layers of acrylic paint.\Acrylic paint is most suitable because of its endurance and fast drying.
Friday June 29 end of Semester 1. First layer to break the white was all over wash. Used a selection of artist grade acrylics and house paint. House paint has the thin consistency and strong colour needed for this project.
Friday June 29. This shows the first layer on the left, the second layer on the right.
Saturday June 30
By end of day 2, third layer of larger pink motifs done. measurement and placement of the squarish shapes is crucial. Saturday June 30 This gives an idea of the width of the top half of the painting, just enough room in the studio!
The four canvases lined up in the top and bottom pairs. Sunday July 1
Time to experiment with colours that will be buried and scale of the motif designing with the assembling of 4 quarters in mind. Sunday night breaking up the pink - the challenge for Monday.
Thinking of the top and the centre of the composition
Played with temperature - the warm(yellowey) and cool (bluish) of a high tone of green sets up a good opposite dischord with the cool pink magenta.


Have to imagine the scale of the marks in the space of the foyer - large. The marks can't be too small to be lost.
The transparent red has a good effect on the pink below.
Outside to have a look in natural light - on a sloping drive but better than no room. The paint is in a tray and I'm using a roller but a large brush is better able to control the thickness of the paint. The red is vibrant and there are several temperatures of pink that I need to work with.
Back in the studio, vertical and need to adjust the horizontal courses to match, about Monday July 2
Achieve unity with the all over transparent red. Monday July 2
The transparency creates beautiful subtle colours and tertiaries
The red is great but texture and light on the surface needs to be enhanced.
Bottom half July 2
Morning Tuesday July 3
Full length July 3
July 3

By Wednesday July 4 needed to get some drama into the work - top left
Top half Wednesday July 4
Bottom half not matching needed to unify and start again
Bottom half colour not right
Bottom half colour back to the magenta, lolly pink and reds needed but bow looked flat. Thursday July 5
Good texture up close but will not be viewed this close in the foyer
Thursday July 4 emphasis too much on the horizontal. Needed to get back to the strong rhythm of the square shapes across the entire surface. Good temperature contrast but surface too smooth
Thursday July 4
Looked at a work from 2008 to get ideas for making the surface more energetic
This is the main viewing distance in the foyer of The Cube
Squeegeed dark violet, cool pink, back to red, transparent pink to unify the jagged marks.Tonal contrast looked good but the paint looked too ragged and horizontal- not enough life on the surface
Problem solved on Friday July 6 by using the bright red gloss with clear varnish to paint 5 generous squares across each of the canvases with the old head of a broom. Very large brush held in hands standing up painting on the vertical.
Friday July 6
Spent all day Wednesday July 11 carefully measuring and applying the over sized transparent violet squares. Not right but at least there was something to eliminate


Buried the violet with more of the lolly pink and magenta on Thursday July 12.


Top left Sunday July 15 one week to go
Top half Sunday July 15 one week to go
Bottom left
Good textures up close
Mistake on top two canvases used warmer pink
which looked brownish against the bright red.
Monday morning July 23 first day teaching Term 3 - 24 hours until delivery. Wrong colours.
Monday night full on recovery of the lolly pink squares on each of the four canvases. Four large canvases drying in studio no room to move around. Fan left on all night to dry the surface for delivery 9am next morning.
Tuesday morning July 24 - pleased with the results - the bottom half
The four canvases outside in the fresh air waiting for pick up. I could tell which was which!
On the floor of the foyer of the Cube July 24 - one month from the opening night August 24
Bolting the canvases together
Sam Maddock graduate Diploma Fine Arts putting the bolts in place
Sam drilling and framing the whole work with red timber frame
Looking good
Lifting into place and securing to wall a challenge. The hanging system superceded by the original proposed brackets
Temporary hang 5pm Tuesday July 24 - thank you to Verity Brookes
The colour on the left is the reflection of the painting in the high gloss wall finish

Photos from the opening night of The Cube Friday August 24 2012.
Big Pink in position for the next ten years.


No comments:
Post a Comment